Many people who keeps a lot of trash and junk in their computer or laptop often re-installs their OS, and the same thing happens a lot to gamers, web geeks and people who use their PC or laptop very roughly and most devices are tempered by other people as many people give their laptop to other co-workers or friends, and finally, they just need to suddenly face very critical problems. And most people, including me, don’t believe in fixing all these things, and as I keep a backup of my whole laptop (on an external drive and some important files in the cloud), I just go for a re-installation. But now, as we all know that DVDs and CDs are out of general use and no one carries a blank DVD and you can’t always find them even in shops. So, the best option is to use a thumb drive or what some people call USB flash drive. Most people now carry at least one of them tied to their key-chain or in wallet. And if you suddenly need to re-install Windows, you don’t need to worry much. Here we will talk about a few methods of creating a bootable flash drive, using which you can easily re-install Windows and yes, its faster than conventional DVDs.
Method 1: Windows 7 USB/DVD download tool (Only for Windows)
This is a tool from Microsoft which can be used to create bootable flash drives and also DVDs from Windows 7 image. This tool is very small in size (Only 2.59 MB) and you can just download and keep it in your flash drive so that you can use it whenever you need it.
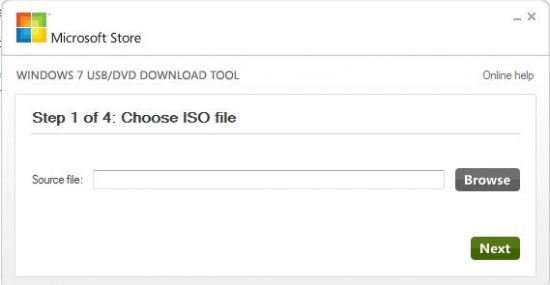
Step 1- You will have to choose the ISO file.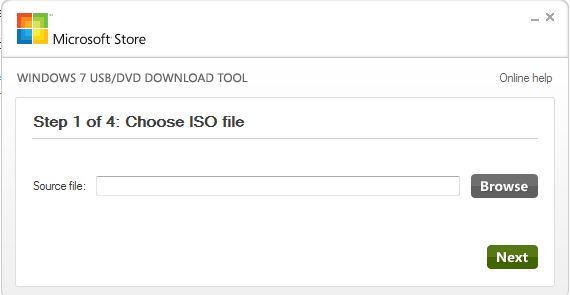
Step 2- Click ‘Browse’ and navigate to the directory where you have kept the image. Select the desired ISO and click ‘Open’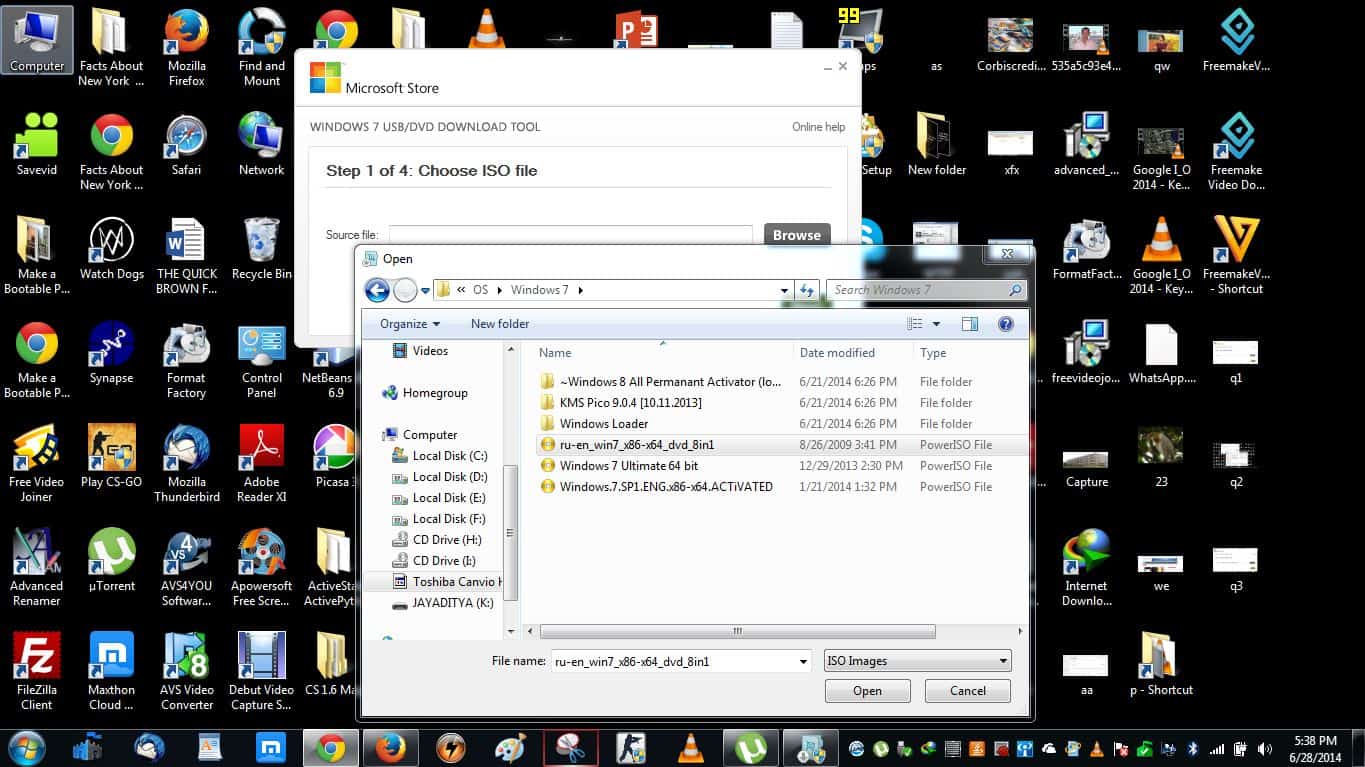 Step 3- After you have selected the ISO, click next.
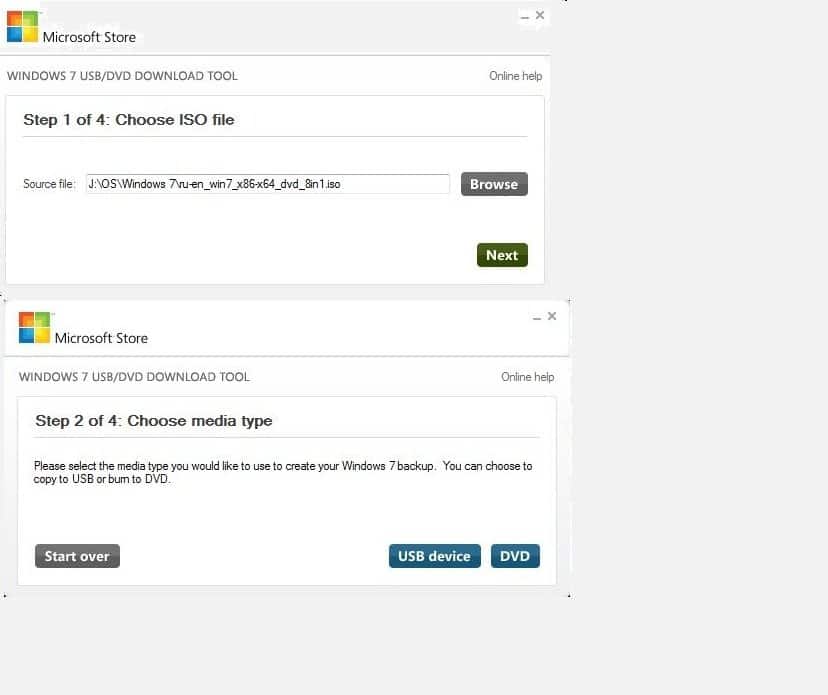 Step 4- Insert the flash drive. You can view the storage available. Though the drive will be formatted in the process.
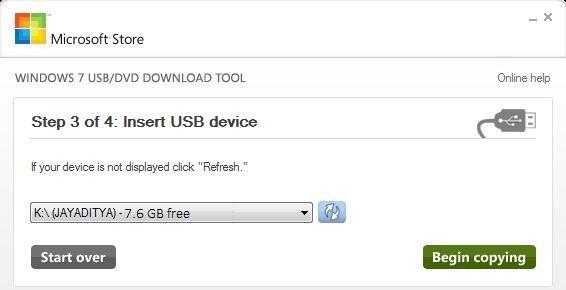 Step 5- Click ‘Begin copying’. It will warn you that the drive will be formatted. Confirm the operation. And you will see that the process has been initiated. At first it will format the drive and then it will start copying the files to the USB and make it bootable.
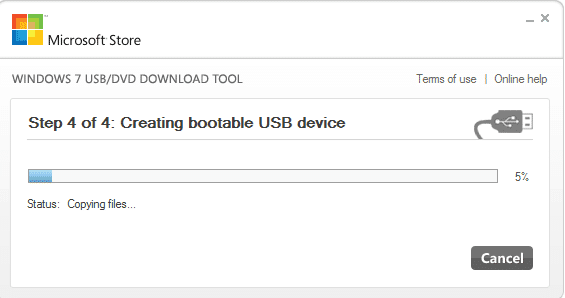
That’s all, after the process is complete, you can eject the USB. Now turn off the computer and insert the USB drive and start it. It should automatically display ‘PRESS ANY KEY TO BOOT FROM CD’. If it does not show the line, open the boot settings by pressing F9 (in most cases).
Method 2: WiNToBootic
WiNToBootic is one of the best tools for Windows OS, that allows you to create a bootable USB flash drive for installing Windows 7 or Windows 8. It supports ISO file, DVD or even a folder as the boot disk source. This great tool needs no installation at all, and it works very fast. And its very similar to the previous tool that we have mentioned. Method 3: Using Rufus
Probably, it is the simplest way to manage your USB flash drives and also for creating bootable USB drives for Windows and Linux installation. Rufus is ultraportable, very easy to use and the program looks pretty similar to the default format window shown in Windows when you format a hard disk partition, USB drive, or other external drive. Along with the job of creating bootable Windows and Linux installation drives, you can also use Rufus to put utilities on USB drives, such as Parted Magic, Ultimate Boot .CD, and BartPE.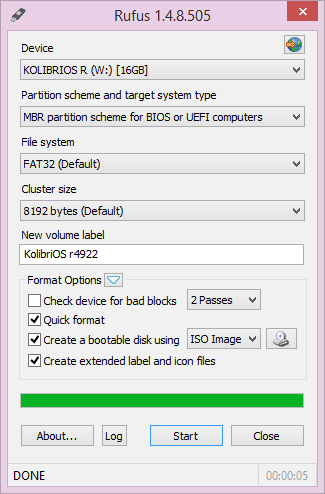



![5 Things Android Smartphone Makers Must Stop Doing [Realme Fanboys Shouldn't Read This] - 17 5 Things Android Smartphone Makers Must Stop Doing [Realme Fanboys Shouldn't Read This] - 10](https://cdn.igadgetsworld.com/wp-content/uploads/2020/06/Man-Yelling-At-Phone-380x250.jpg)

